Compose Multi-Platform App State

Compose State Variables

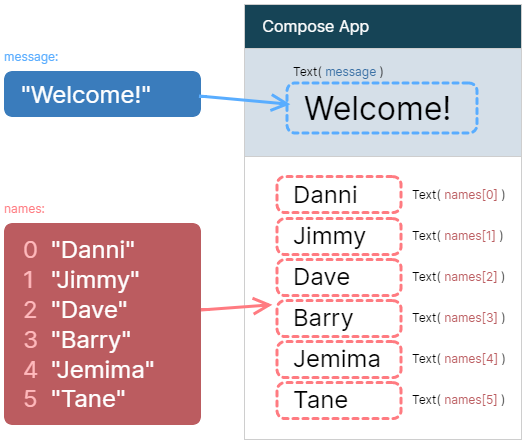
The state of an application is held by its variables, lists and objects. The values of these change as the application runs. Often we want this change of state to be reflected in the UI: text to update, values to alter, etc.

State Variables

To make this easy, Compose MP provides state varaibles that are 'observable' which means that they are monitored for changes - Any UI elements that are linked to them are automatically updated when the variable values change.

Compose state variable

Using Compose State Variables

Where to Declare State Variables

Declare state variables inside the @Composable function that will use it. This will often be App(), but it could be within a smaller element within the App.

How to Declare State Variables

State variables are created as:

For single Strings, Ints, etc.
For lists (arrays) of objects

To create a single state variable use the by keyword. For a list state varaible, use =. Wrap the declaration in a remember {...} block to preserve the value when the UI updates...

Example State Variable Declarations

Text Showing State

Please wait... Setting up system Connecting to server System ready

The Text element can be used to display text which can be styled in various ways.

Text can be linked to an observable, mutable object created via mutableStateOf(...) meaning that any chnges to the object will caude the UI to update accordingly.


                fun main() = singleWindowApplication(
                    title = "System Status"
                ) {
                    App()
                }

                @Composable
                fun App() {
                    // Value will be updated elsewhere in the code
                    var status by remember{ mutableStateOf("Please wait...") }

                    Column {
                        Text(status)
                    }
                }
            

Responding to Buttons

Pick an option... You picked A You picked C You picked B

Button elements can trigger a change in internal state, which could then be reflected in Text elements.

Buttons require an onClick parameter with the code that is run when the Button is clicked. Here is where the internal state can be updated.


                fun main() = singleWindowApplication(
                    title = "Pick an Option"
                ) {
                    App()
                }

                @Composable
                fun App() {
                    var message by remember { mutableStateOf("Pick an option...") }

                    Column {
                        Text(message)

                        Row {
                            Button(onClick = {
                                message = "You picked A"
                            }) {
                                Text("A")
                            }

                            Button(onClick = {
                                message = "You picked B"
                            }) {
                                Text("B")
                            }

                            Button(onClick = {
                                message = "You picked C"
                            }) {
                                Text("C")
                            }
                        }
                    }
                }
            

Text Changing State

Enter name... Welcome, Jimmy!

The OutlinedTextField element can be used to get text input from the user.

TextFields require an onValueChange parameter with the code to be run when text is typed.

A TextField will usually update an observable, mutable object created via mutableStateOf(...), so the value parameter is set to the object and the onValueChange code updates the object.


                fun main() = singleWindowApplication(
                    title = "Who Are You?",
                ) {
                    App()
                }

                @Composable
                fun App() {
                    var name by remember { mutableStateOf("") }
                    var welcome by remember { mutableStateOf("Enter name...") }

                    Column {
                        Text(welcome)

                        OutlinedTextField(
                            label = { Text("Name") },
                            value = name,
                            onValueChange = { name = it }
                        )

                        Button(
                            onClick = {
                                welcome = "Welcome, $name!"
                            }
                        ) {
                            Text("Save")
                        }
                    }
                }
            

List of Strings

Employees Rosalind Franklin Albert Einstein Marie Curie Isaac Newton Nikola Tesla Ada Lovelace

Rather than use a MutableListOf<String> to store a list of Strings, instead use a MutableStateListOf<String>. This is an observable list, meaning that any changes to it will cause the UI to update accordingly.

A loop is used to show UI elements for the list.

Lists with Complex Content

Users 001 Jimmy Smith 216 Helen Pickles 037 Nigel Waffle 165 Sally Turnip

When a list of items is required that is more than just simple text (e.g. it might have multiple data fields, action buttons, special styling, etc.) it is best to create a separate, custom @Composable element for this.

This keeps your code much more modular, readable and compact.

Modifying List Items & Updating the UI

You need to buy... Apples 10 6-Pack Craft Beer
1 2 2 1
Toilet Cleaner 8

When we use MutableStateListOf<Type>, the list observable so the UI will react to any changes to it, such as adding or removing items.

However, if individual items in the list are modified, the UI will not react. This is because the UI is not 'observing' the individual objects, but only the list as a whole.

The easist way to make the UI react to individual object updates is to replace the object with an updated copy using the data class .copy() function. This modifies the containing list, so the UI reacts.

Working with Dates

Enter your date of birth...
You were born on 25/09/1978
so you are 45 years old

An OutlinedTextField element can be used to get a date from the user. However, internally, you would want to store the date as a LocalDate object, so that it can make use of the many features of this class (e.g. date comparisons, offsets, etc.).

Since the text field works with Strings, you need to convert the LocalDate to/from a String.

For this you need to define a formatter with the date format you plan to use (e.g. 30/06/2021, 30-06-2021, 30 Jun 2021, etc.)

Note that these examples have spacing added around elements to help show how the layouts work. The code snippets don't apply the same spacing.